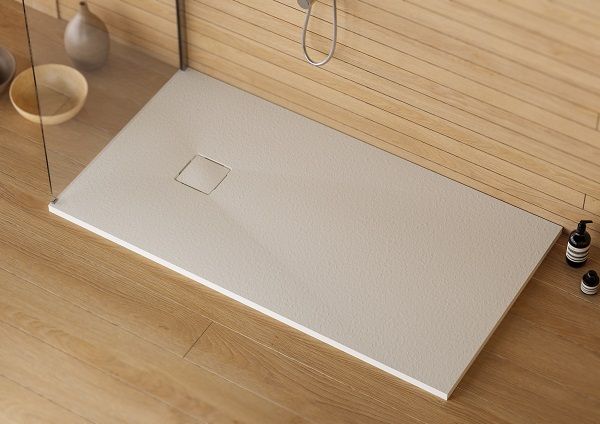
Changing the shower tray for a new one may seem like a complex task, but with the right steps and a bit of patience, it can be done. Whether you're replacing a floor-level tray, a resin tray, or one made from a new material like Solid Surface Acrymold®, this process is completely achievable if you follow the proper instructions. In this guide, we explain how to change the shower tray step by step to achieve a perfect finish. Let's get started!
Steps to change a shower tray
1. Remove the old shower tray.
Turn off the water: Close the main water valve to avoid leaks or flooding during the work.
Remove the sealant: Use a utility knife or sharp blade to remove the silicone or sealant that connects the tray to the wall and floor.
Disconnect the drain: Loosen the drain connections with a wrench and cover the hole with a cloth to prevent debris or dirt from falling in.
Remove the tray: If the tray is attached with cement or adhesive, use a crowbar or spatula to carefully detach it.
?️ Tip for removing a very fixed tray
If the tray is very fixed, you can carefully break it with a hammer and chisel to remove it more easily.
2. Prepare the base and drain.
Clean the surface: Remove any mortar, adhesive, or sealant residues left on the base.
Check the level: Use a spirit level to ensure the base is perfectly straight. If it's not, apply a layer of self-leveling mortar.
Inspect the drain: Check that the pipe is clean and free of blockages. If necessary, replace it with a new siphon compatible with the new tray.
Adjust the height: Make sure the drain and tray are at the same height to ensure proper water drainage.
3. Install the new shower tray.
Do a dry fit: Place the new shower tray without fixing it to check that it fits perfectly.
Apply adhesive or mortar: Spread a uniform layer of mortar or adhesive suitable for the tray's material.
Set the tray: Place the tray on the base carefully, applying light pressure to ensure good adhesion.
Check the level: Before the adhesive sets, check with the spirit level to ensure the tray is perfectly aligned.
4. Measure and cut the shower tray if necessary.
Take the exact measurements: Measure the available space and mark the areas to be cut on the tray.
Cut with the proper tool: Use a circular saw with a diamond blade to make precise and clean cuts.
Smooth the edges: After cutting, use a fine sandpaper to smooth the edges and remove imperfections.
Check the fit: Place the tray in the gap and verify it fits correctly before securing it.
5. Level the shower tray for a perfect finish.
Place wedges or shims: If the floor isn't perfectly level, use PVC or treated wood shims to adjust the tray's height.
Check the level: Use the spirit level at various points on the tray (center and corners).
Fill the gaps: If you detect unevenness, apply more adhesive or mortar to the necessary areas.
Ensure stability: Once leveled, let it dry for at least 24 hours before continuing with sealing.
6. Connect the drain of the new shower tray.
Install the siphon or valve: Install the drain valve in the tray's hole, ensuring a complete seal.
Connect the pipes: Attach the siphon to the drain pipe, using rubber seals and tightening the threads properly.
Check for leaks: Before permanently sealing, pour some water to check for any leaks.
Seal the joint: If necessary, apply a layer of sanitary silicone around the valve.
7. Finalize and seal the joints properly.
Clean the surfaces: Make sure the edges are dry and free from dust or grease.
Apply the silicone: Use neutral or special silicone for bathrooms and apply it with a gun on the joints between the tray and the walls.
Smooth the seal: Use a wet spatula or your finger to smooth the joint and remove excess silicone.
Let it dry: Wait at least 24 hours before using the shower to ensure a durable, leak-free seal.

Epoque shower panel
Considerations when replacing a shower tray with a larger one
If you decide to replace a shower tray with a larger one, it's important to consider a few additional factors:
- Available space: Make sure the space where you will install the new tray is large enough to accommodate it.
- Drainage: A larger shower tray may require a different drainage system. Ensure that the plumbing system is compatible with the new tray.
- Aesthetics: Sometimes, a larger shower tray can change the aesthetics of the bathroom, so consider the overall design and materials you'll use.

Vulcano shower panel
Frequently Asked Questions About Replacing a Shower Tray
What to do if the new shower tray doesn't fit the available space?
If the new shower tray doesn't fit perfectly, you can cut it to better fit the available space. Be sure to measure precisely and cut only what is necessary. You can also consider using a smaller or differently shaped tray to fit better.
How to ensure that the new shower tray is properly sealed?
Sealing is crucial to prevent water leaks. Use high-quality silicone to seal the joints between the shower tray and the walls. Apply an even layer and make sure there are no gaps. Allow the sealant to cure completely before using the shower.
How long does it take to replace a shower tray?
The time needed to replace a shower tray varies depending on the complexity of the work and the experience of the installer. In general, the process can take between 3 and 5 hours. If the work requires modifications to the drainage system or the tray size, it may take longer.
Is it better to do it yourself or hire a professional?
Although replacing a shower tray can be a task you can do yourself if you have experience, it is recommended to hire a professional if you're unsure. Shower tray installation experts ensure quick, hassle-free work, making sure everything is properly sealed and functional.
✅ Important Tip
If you're unsure, hiring a professional will avoid mistakes and give you peace of mind.