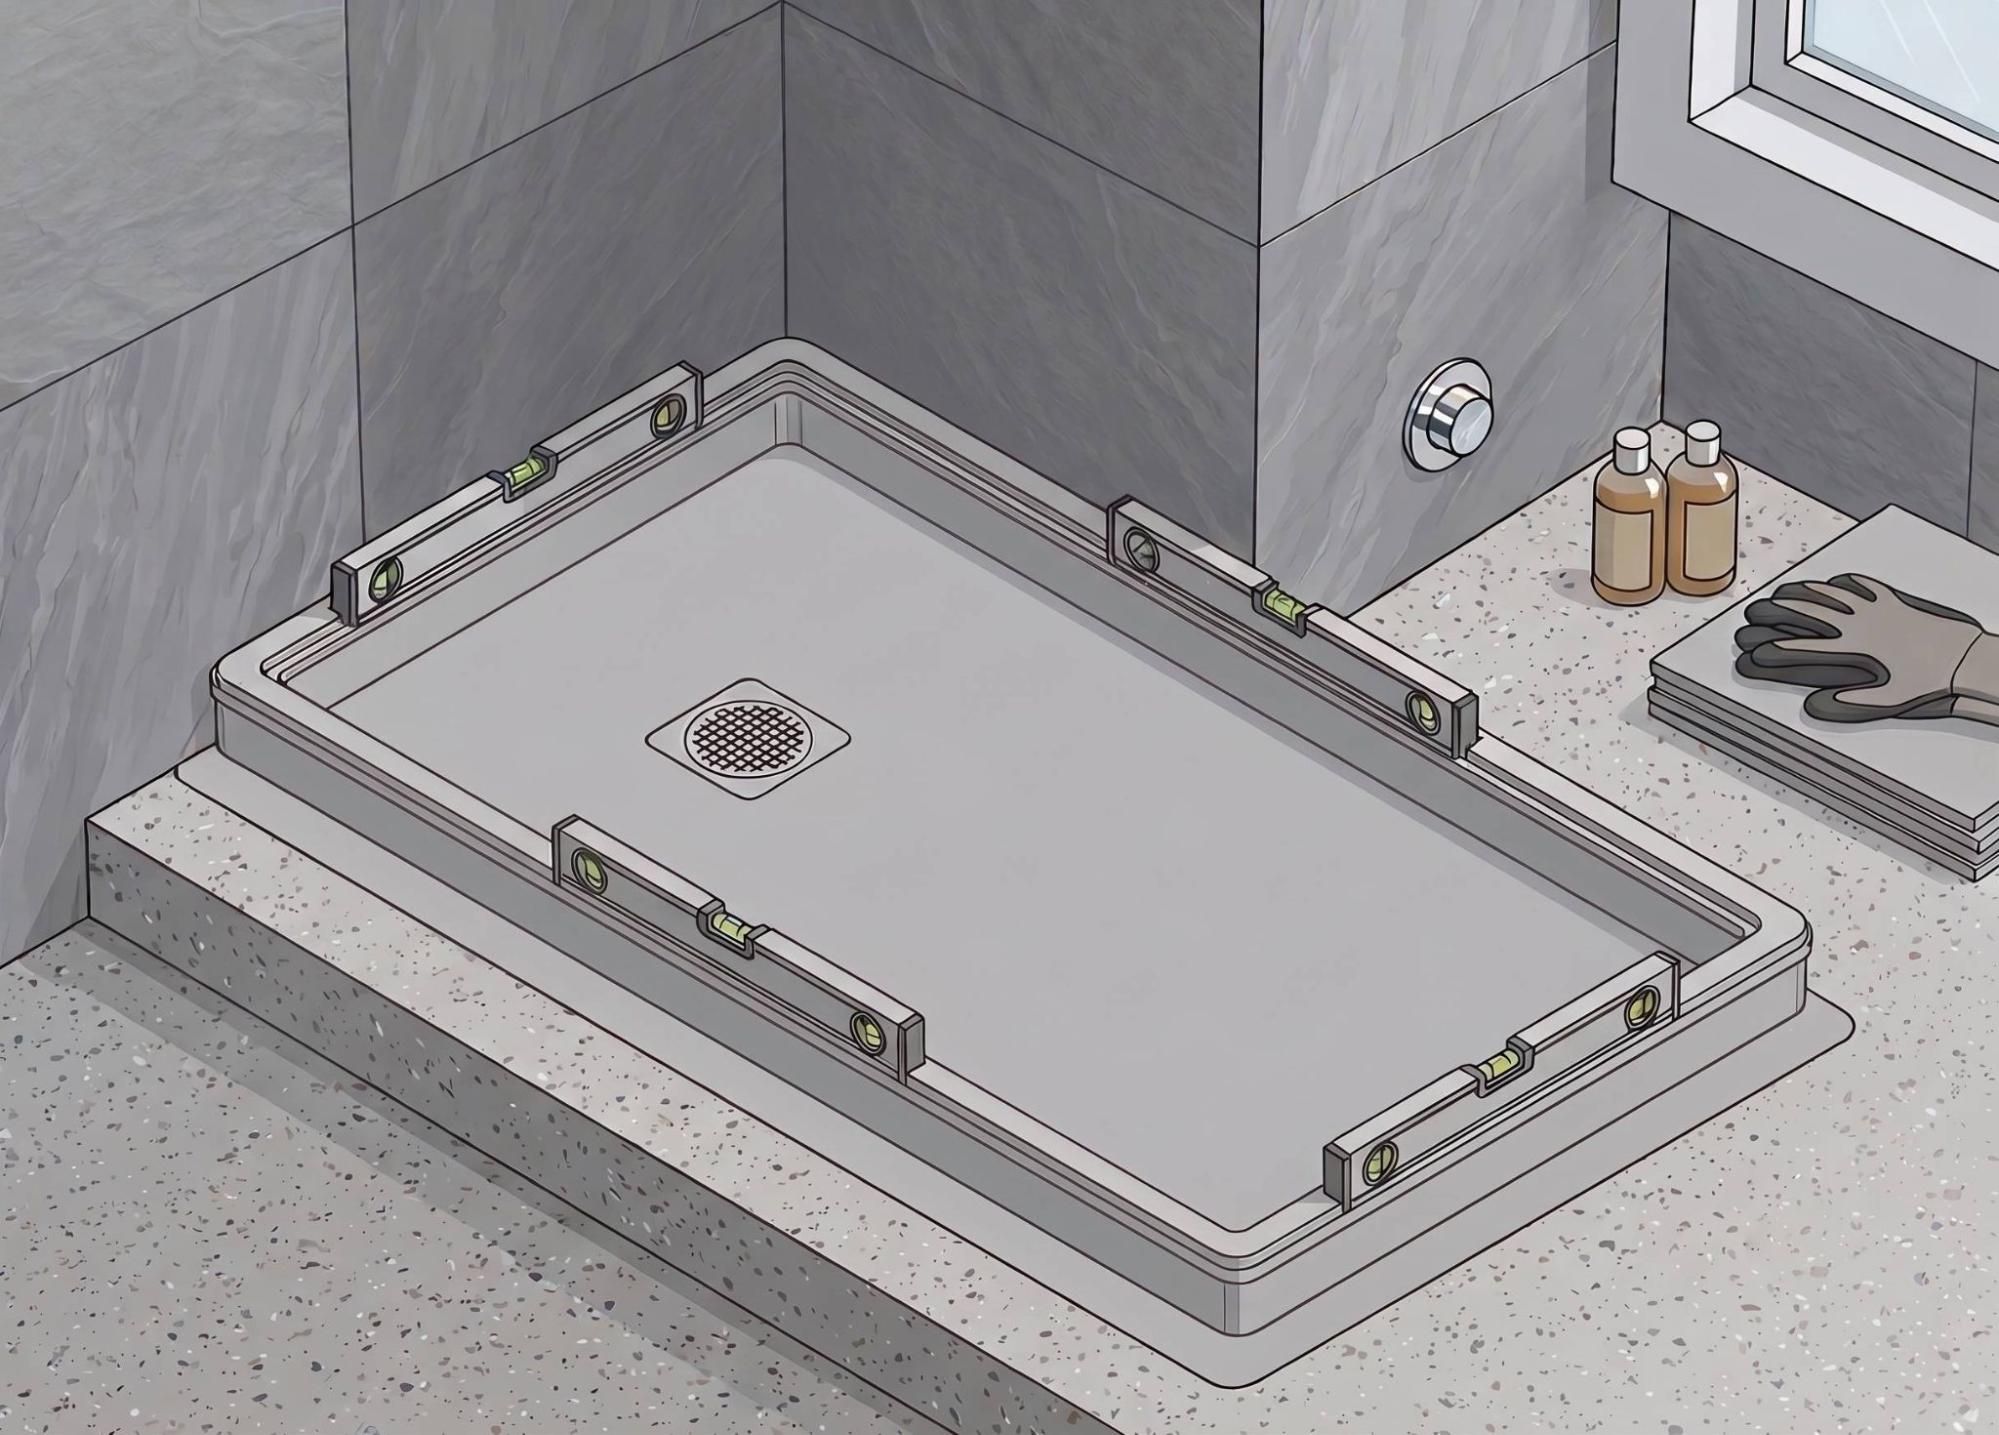
A large part of the problems that arise after installing a shower tray are not related to the tray itself, but to the preparation of the support base. An uneven base, with gaps or a poorly planned drain, will cause movements, unnecessary stress, or, even worse, will become one of the typical errors that cause leaks in a shower tray.
When the support is properly prepared, the tray works as it should: it rests continuously, drains water correctly, and maintains its stability with daily use.
How to prepare the support base before installing a shower tray
Why is it important to prepare the base correctly?
A shower tray should not compensate for defects in the floor on which it is installed. The base must be properly prepared before positioning the tray, with an even, clean surface and no areas that give way under pressure.
Stability depends on three conditions that must be checked together:
- A firm surface, free from construction debris, rubble, dust or points that could create uneven support.
- A continuous base that distributes the load of the shower tray and the people who will use it.
- A properly planned installation height to accommodate the waste valve and maintain correct drainage without forcing the pipes or connections.
Flatness: how to detect irregularities before installing the shower tray
The base should be as smooth and even as possible. Any unevenness, mortar residue or sunken area may prevent the shower tray from being properly supported across its entire surface. Before installing it, inspect the entire base: the centre, corners, edges and drainage area. This will allow you to detect and correct any irregularities before fixing the shower tray in place.
Basic on-site inspection tools
Checking the flatness does not require a complicated process, but it does require precision. The following tools are usually sufficient:
- A long metal straightedge or aluminium straightedge.
- A spirit level suitable for the dimensions of the shower tray.
- A tape measure and pencil for marking reference points.
- Wedges or feeler gauges to detect gaps beneath the straightedge.
- A vacuum cleaner or brush to remove dust and debris before checking.
Place the straightedge in different directions: lengthways, crossways and diagonally. If you find gaps, high points or areas with uneven contact, the base must be levelled before continuing.
Do not rely on the adhesive to “fill in what is missing”. The base must be properly prepared to provide an even surface, ensuring that the shower tray is supported without stress and remains stable throughout its service life.
Levelling: what should be checked before fixing the shower tray
When we talk about levelling a shower tray, it is not simply a matter of placing a spirit level on top and checking that the bubble is centred. You must also respect the tray’s own geometry and ensure that the water flows correctly towards the waste valve.
At mcbath, our shower trays incorporate a slope designed to direct water towards the drain. The base must therefore be properly levelled and must not alter the slope built into the tray.
The check should be carried out by dry-fitting the shower tray without adhesive and inspecting both the sides and the drainage area. This confirms that the tray is stable and that it is not resting on isolated support points.
Drain height and dry fitting
Before fixing the shower tray, check that the waste valve is correctly positioned and does not protrude above the base. Also check that the waste pipe maintains the required slope and has no backfalls, restrictions or movement.
At mcbath, we recommend preparing a smooth and level base, checking that the drain is at the correct height and positioning the shower tray before fixing it. This allows us to confirm that the tray is properly supported, that the waste valve fits precisely and that the drainage system works correctly. At this stage, you should:
- Position the shower tray in its final location.
- Check that the waste valve aligns perfectly with the drain opening.
- Check that the shower tray does not rock or move when pressure is applied to different areas.
- Check the level without altering the tray’s built-in slope.
- Carry out a drainage test before fixing the complete assembly.
Support points: why the shower tray should not rest over voids
The shower tray must be continuously supported across its entire base. When a tray is supported only in specific areas, it may initially appear stable, but the voids beneath the surface will eventually create stress during everyday use.
When pressure is applied to an area without sufficient support, the shower tray may flex, make noises or transfer stress to the joints with the wall and surrounding finishes. A properly completed installation distributes the load evenly across the entire supporting surface.
Continuous support and load distribution
The shower tray must rest evenly on a firm, properly levelled base. The key is to avoid voids beneath the corners, sides, central area or around the drain.
To ensure proper load distribution, avoid:
- Isolated support points.
- Mortar residue or other elements beneath the tray.
- Hollow areas or areas with insufficient material.
- Uneven surfaces that have not been properly levelled.
- Correcting significant unevenness with an excessive amount of adhesive.
When the shower tray is continuously supported across its entire surface, it provides greater stability underfoot. This reduces the risk of movement and helps the perimeter seal remain in better condition over time.
Final preparation of the supporting base before applying adhesive
Once the flatness, levelling and continuity of the support have been checked, prepare the base for the final fixing of the shower tray. The supporting surface must be clean, dry and free from dust, construction debris or loose particles that could affect adhesion. Before installing the shower tray, check that:
- The base is sound and properly levelled.
- There is no mortar residue, dust or moisture.
- The surface has the required flatness to ensure uniform support.
- The waste valve is correctly installed.
- The drain is at the correct height for the installation.
- The shower tray has been dry-fitted and remains stable across its entire surface.
- The fixing system is suitable for both the shower tray and the supporting base.
At mcbath, we always recommend following the specific installation instructions for each model. This ensures that the shower tray is correctly fixed, stable and ready to deliver reliable performance from day one.
On-site checklist for a safe installation
Before fixing the shower tray, review this checklist:
| The base is clean, dry and firm. |
| The supporting surface is free from construction debris and weak areas. |
| The flatness of the shower tray base has been checked using a straightedge and spirit level. |
| There are no gaps, raised edges or sunken areas. |
| The shower tray base provides continuous support. |
| The shower tray remains stable during dry fitting. |
| The waste valve aligns correctly with the drain. |
| The drainage system works without difficulty. |
| The tray is correctly leveled without modifying its original slope (our Lifter system facilitates this process). |
| The shower tray’s support points are distributed across the entire surface. |
| The adhesive is compatible with both the shower tray and the supporting base. |
| The manufacturer’s instructions have been followed. |