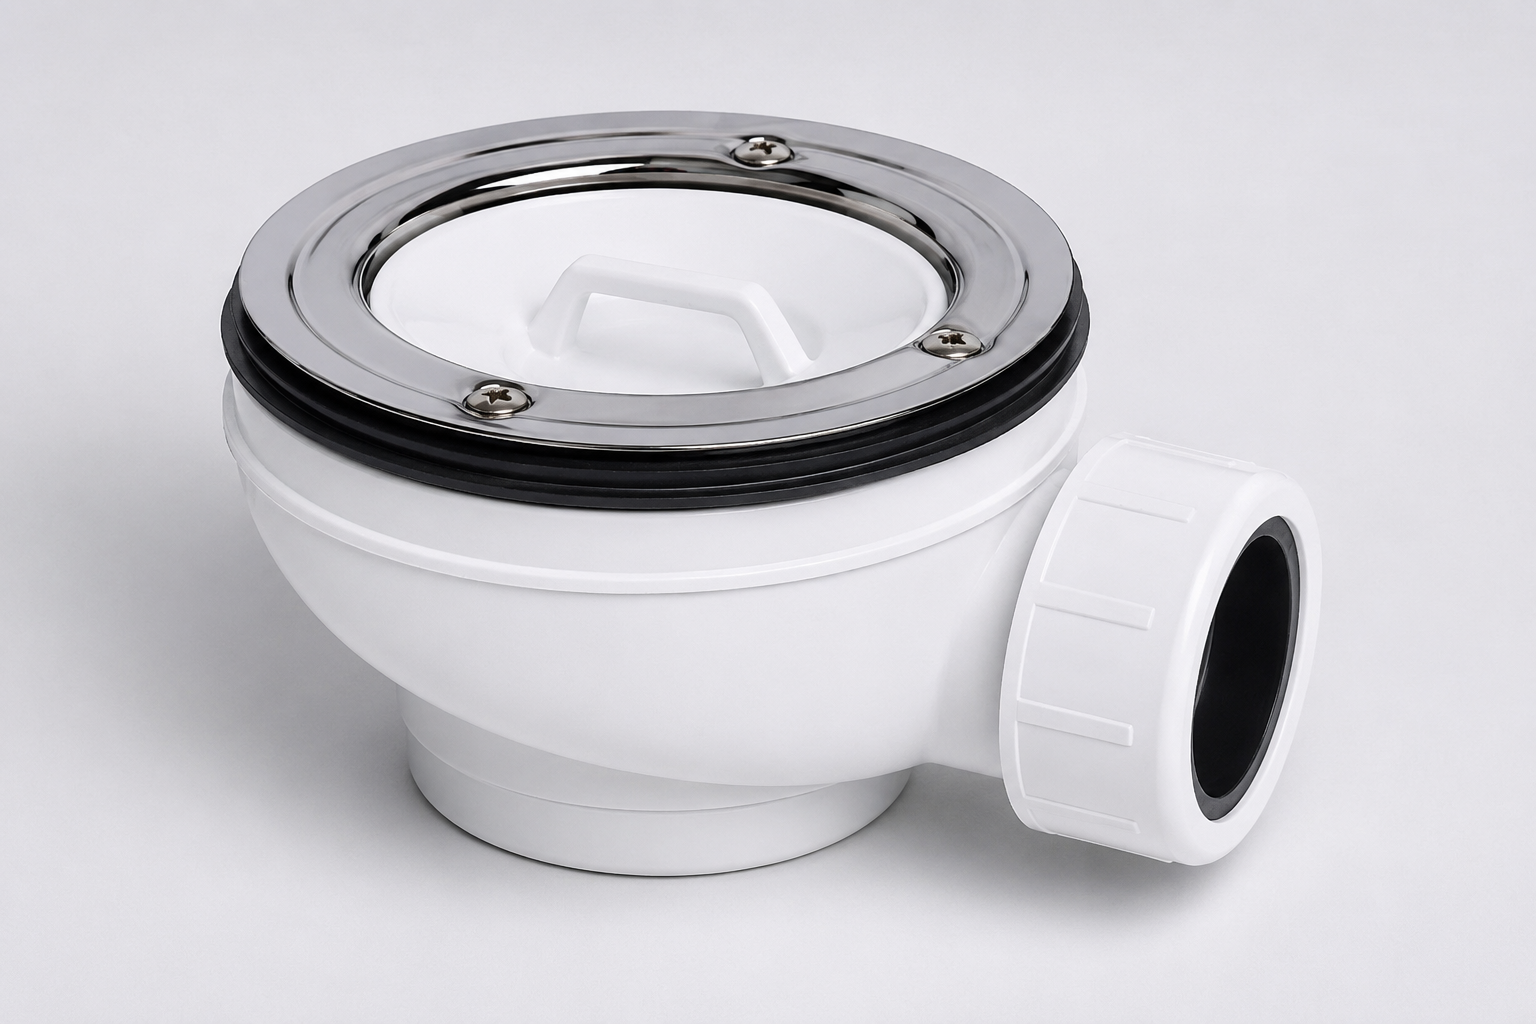
When choosing a trap for an ultra-low-profile shower tray, you need to check five key aspects: the available height beneath the tray, the drainage flow rate, the outlet diameter, compatibility with the shower tray, and the distance to the drainage system. In installations where space is limited, these factors ensure that water drains away correctly and that the system operates reliably.
For this reason, you should not choose a trap simply because it is the lowest-profile option. It is important to assess the installation as a whole to ensure efficient drainage, facilitate maintenance and prevent problems such as unpleasant odours, water build-up or leaks.
Differences between trap, valve, and drain
Although they are often used synonymously, trap, valve, and drain are not exactly the same thing. The drain valve is the piece attached directly to the shower tray hole. It collects water from the surface and ensures watertightness at the connection point using gaskets and tightening elements.
The trap is the component that incorporates a water seal. It retains a small amount of water inside to prevent gases and odors from the sewage network from entering the bathroom. It can be integrated into the valve itself or installed as an independent piece.
The term drain refers to the complete assembly responsible for evacuating water: valve, trap, pipes, connections, and the branch line to the soil stack or sewage network. Therefore, when we talk about choosing a trap for an ultra-flat shower tray, we usually refer to a low-profile trap valve assembly that must be compatible with both the tray and the installation.
It is also important to check if the bathroom has a gully trap (bottle trap). Installing two water seals in series can harm evacuation and encourage siphoning, noise, or bad odors.
What to check before choosing the trap
Before selecting a trap for an ultra-flat shower tray, we must review the entire installation, not just the product dimensions. The main data to check are:
- Total available height under the tray.
- Diameter of the drain hole.
- Diameter and position of the existing pipe.
- Orientation of the trap outlet.
- Maximum flow rate of the taps or shower system.
- Evacuation capacity declared by the manufacturer.
- Presence of a gully trap in the bathroom.
- Top access for cleaning and maintenance.
- Compatibility between gaskets, valve, grate, and tray thickness.
The tray's technical sheet should always be the starting point. Not all models use the same valve nor accept just any sealing system or grate. Even if several parts have a similar nominal diameter, gasket geometry, mounting depth, or tightening methods can vary.
It is also a good idea to carry out a dry fit before securing the shower tray. This test allows you to check that the valve is centred, that the outlet can be connected without straining the pipework, and that there is sufficient space to maintain the slope of the drain. If you need to review the entire process, you can consult our step-by-step guide on how to install a resin shower tray.
Available height under the shower tray
Height is one of the main constraints in an ultra-flat shower tray. The space must accommodate the valve body, trap, connection, and drainage pipe with its corresponding slope.
We must not measure only the trap height indicated in the catalog. You must calculate the full distance from the bottom of the tray to the lowest point of the installed assembly. The following must also be considered:
- Thickness of the support base or screed.
- Position of the pipe centerline.
- Gaskets and connection nuts.
- Space required for assembly.
- The slope needed for the pipe down to the stack.
- Potential crossings with other utilities.
A very shallow trap can facilitate a flush-to-floor installation, but its lower height may imply a narrower internal path or a different discharge capacity. That is why we should not choose it solely based on its profile.
When space is insufficient, the solution should not be deform connections, eliminate the water seal, or install a pipe without a slope. In that case, it will be necessary to rethink the tray elevation, modify the drain route, or resort to a solution specifically designed for renovations.
Drainage flow rate and outlet diameter
The trap must evacuate more water than the shower can deliver under normal conditions. To verify this, compare the maximum tap flow rate with the discharge capacity declared by the valve manufacturer.
This check is especially important when installing:
- Large-format shower heads.
- Rain showers.
- Systems with multiple simultaneous outlets.
- High-flow thermostatic units.
- Ultra-flat trays with low accumulation capacity.
It is best to work with a margin of safety. If the drain flow rate is too close to the tap flow rate, any reduction caused by hair, soap, or poor slope can cause water to pool on the tray.
Discharge capacity must always be tested under identical conditions. A value expressed in liters per second at a given water head above the valve cannot be directly compared to another measured under different conditions.
We must also distinguish between three diameters:
- The tray hole diameter.
- The valve connection diameter.
- The branch pipe diameter.
A 90 mm hole does not mean the outlet pipe is also 90 mm. Many ultra-flat trays use valves for 90 mm holes that subsequently connect to smaller diameter pipes.
It is not recommended to reduce the diameter in the direction of evacuation. Nor should we create a route with too many elbows, counter-slopes, or narrowings, as they increase head loss and promote debris buildup.
Compatibility with the tray and existing installation
Compatibility must be verified in two directions: with the shower tray and with the existing drainage network. Regarding the tray, check the hole diameter, mounting area thickness, fixing system, and type of grate or cover. Regarding the installation, check the pipe diameter, position, available slope, and the bathroom’s trapping system.
The safest option is to use the valve recommended or supplied by the tray manufacturer. Before final assembly, ensure that:
- The gasket seats evenly.
- The valve is centered in the hole.
- The body does not touch the slab floor.
- The pipe connects without tension.
- The outlet maintains a continuous slope.
- The assembly can be disassembled from above for cleaning.
- There is no second trap causing double-trapping.
Tray hole diameter
The hole diameter determines which valve can be fixed directly to the tray. 90 mm holes are used in many ultra-flat models, but it is not a universal measurement. Other diameters and drainage systems exist, designed specifically for a particular collection or model.
To avoid errors, measure the hole or consult the technical data sheet. The valve's commercial reference must explicitly state it is suitable for that diameter.
You must also check the tray thickness around the drain area. The length of the screw or tightening system must allow proper compression of the gaskets without deforming the tray or leaving a loose connection.
An apparently compatible valve may not be if:
- The gasket does not cover the seat correctly.
- The body protrudes above the surface.
- The grate does not sit flush.
- The tightening system does not accommodate the tray thickness.
- The bottom geometry interferes with the installation base.
Do not modify the hole, grind down the tray, or replace gaskets with improvised ones. Any adaptation must be authorized by the manufacturer.
Outlet type and orientation
The trap outlet can be horizontal, swivel (steerable), or vertical. The choice depends on the pipe position and available space.
Horizontal outlets are the most commonly used in renovations and ultra-flat trays because they allow connecting the drain to a pipe running under the tray. Make sure the mouth points toward the network without requiring sharp turns.
Swivel outlets offer greater flexibility when the pipe is not perfectly aligned. Still, they should not be used to offset major layout errors or force a connection.
Vertical outlets can be suitable when evacuation goes straight through the slab, provided the project and construction conditions permit it.
The connection must remain stress-free. Forcing the trap to reach a displaced pipe can deform gaskets and lead to leaks once hidden. If the outlet does not align, it is better to adjust the route using suitable fittings and a simple layout.
Cómo limpiar el sifón del plato de ducha
In an ultra-flat shower tray, the trap must be cleanable from the top. Once the tray is installed, there is usually no access to the lower body without dismantling the unit or undertaking masonry work. Prioritize valves that feature:
- Removable grate or cover.
- Hair strainer.
- Removable trap cup.
- Direct access to the drain pipe.
- Internal components that are easy to remove and replace.
- Spare parts availability.
Periodic cleaning prevents hair, soap residue, and limescale from reducing flow rate. Basic maintenance consists of removing the grate, extracting the inner filter or cup, and clearing accumulated debris.
Do not use objects that could puncture gaskets or overly corrosive products that deteriorate plastic components. For PVC pipes, avoid aggressive cleaners and always follow manufacturer instructions.
After cleaning, reinstall all parts correctly. A poorly seated trap cup can let odors through, while a misplaced strainer can reduce the flow passage area.
In showers left unused for long periods, the water seal can evaporate. Running water periodically helps maintain the barrier against odors from the sewage network.
Common mistakes when choosing or installing the trap
One of the most common errors is choosing a trap based solely on its height. A compact model will not be suitable if it lacks the required flow rate or does not fit the tray. Avoid these mistakes as well:
- Confusing the hole diameter with the pipe diameter.
- Buying a valve without checking the tray thickness.
- Reducing the evacuation diameter to make connections easier.
- Installing an individual trap when a gully trap already exists.
- Using too many elbows or flexible connectors.
- Leaving sections with counter-slopes.
- Forcing the trap outlet to match the pipe.
- Installing a valve without top access for cleaning.
- Applying sealants where mechanical gaskets should work.
- Closing up the installation without performing a leak and drainage test.
The test must be carried out before permanently fixing the tray. Pour water continuously, check the evacuation speed, and inspect all joints. Water must not accumulate around the valve or appear at the lower connections.
You must also test behavior under the shower's actual flow rate. A test with a small amount of water might catch a leak, but it cannot confirm the system drains properly during real use.
Choosing the right trap for an ultra-flat shower tray must be part of the complete layout planning. Checking dimensions, flow rate, diameters, slope, and maintenance access allows you to work with greater confidence and avoid issues once the renovation is finished. If your installation is constrained by height or existing routing, at mcbath we help you evaluate the best solution so your tray functions flawlessly from day one.